1965 Airstream Safari

1965 Airstream Safari
Coming Home

Thursday, March 19, 2015

Almost Ready to Live Riveted!!

Just a few short weeks ago we had a little snow and I thought our Little Wheelies looked awfully cute!

We are going to take our Little House on The Wheelies on the road in mid-April!  
It will be our maiden voyage and I am beyond excited!


With our looming deadline we (as in Robert) are really moving rapidly in our
renovations these last few weeks.  New water heater is in, new plumbing is done,
new furnace is 75% installed, new refrigerator is in and waiting for it's stainless panel.
The best part is we have water in the kitchen!
My beautiful Danze Anu faucet is stunning or should I say running!


 Another element I wanted was a stainless panel behind the cooktop.
I have noticed others using it as a magnetic storage surface
and a cute spot to decorate.  Works for me. 


My first rivet!  It's actually not that hard!


Ta Dah! I am so proud of that little thing!


And it's in!  I can hardly wait to stick stuff on it.
  We also added a stainless panel at the underside of the top cabinets
The range hood was no longer working and we could not find a match that worked 
with the existing venting so we have opted to cover it in the metal.  Which makes
us fire resistant in the event of some over enthusiastic cooking and it really looks cool.
We have two new fantastic fans to install so we should be just fine.
I am prone to high performance cooking but I am anticipating more
BBQing than actual cooking on the cooktop.
I will post a photo of all of it soon. 


On another note Robert decided to replace all the rest of the copper plumbing
with Pex. He turned the water on this winter and he found a pipe had burst.
Not wanting to be dealing with this every year he said "to heck with it" and tore
the rest of the old plumbing out.  When it was all replumbed we gathered
around like new parents to see if it was all going to work. Well we were a
bit surprised when we had a "water feature"coming out of the bottom of the
rear of the trailer.  Though it was kind of interesting we knew this would not
be a long term hit in the RV parks!  Fortunately Robert remembered he had

taken a cap off and it was just waiting to be put back on.
Water feature eliminated!


One last thing,  when Robert replaced the water heater it came with a new access
door and it was white.  I decided to put my crafty paint skills to work and
we now have a faux aluminum access door. A couple of cans of Aluminum
colored spray paint got me there.  We shall see how it holds up but I think it
is a pretty good match. 

Before


After


I am putting together my list of supplies for our little sojourn.  Planning and dreaming
about all the cute things we will need.    Maybe, maybe this weekend
I will finally get to put that mattress in there.

Back to you soon.


Wednesday, February 4, 2015

All Quiet on the Western Front


With the holidays, work and chilly weather we haven't done much on our Airstream project lately.

A couple of Saturdays ago we had a nice warm day so I decided to tackle a couple of little things.
After chatting with several of my tile contractor friends and reading the blogs of other renovators,
 I decided to go ahead and grout my splash.  The goal is to keep the tile and grout from cracking 
while the trailer is being towed.  I deliberately kept it low.  It's just a little over 3" tall.  Then I decided
 I would use a poly/latex grout.  With that decision made, I jumped in.


On a side note, we are going to add a magnetic metal panel above the splash and cooktop.
A great place for extra storage and cuteness to flourish. 


I am super happy with my tile choice, it's neutral, hip and with the little metal accents
it looks very Airstreamy to me!

The other designerish thing was finally getting to hang the drapes.  The drapes were the first thing I 
made after we purchased the Airstream. They have been draped over the back of a chair in our guest 
room for months now.  With the major construction out of the way, I think Robert opted to throw me
a bone to keep me distracted and not pestering him about things like vents and water heaters.

So I put them up and they are adorable!  Just as cute as I imagined. 


I thought while I was on a roll I would just throw out the idea of putting in the mattress
(which could quickly be followed by more cute stuff.)  That idea was met with "the" look
and eye roll.  Back to waiting.  However it is still pleasantly warm for February and
I may just work on another little decorative item this weekend.
 Back to you soon. 

Tuesday, December 9, 2014

Cuteness Corner Turned!


This was a good weekend!  We did something that actually created a
sense of the coming completion of our project. 

We, Robert tackled the countertops this weekend.  They are cute, cute, cute!
The Mandarin Red Wilsonart Laminate looks as terrific as I imagined.


 Here are a couple of DIY photos.  We wanted to use a vintage look metal
band at the edge of the tops.  Very appropriate for a 1965 airstream.
We picked this ribbed metal edge.

after gluing the laminate to the wood Robert began to apply the metal edge.
note the thin slot on the table edge that the metal slides into.

carefully tap the edge into the slot cut into the wood
 
sweet!


 After much discussion and beta testing we decided the
removable leg should go right here!


I love it!  The pop of red is perfect!  Not too red, not too orange, just right!

On a totally different subject I did a little window repair recently.  I was so
frustrated trying to pull out 50 year old rubber that had basically melted into the
window track.  After quite a bit of research on how to solve my repair dilemma
I found my way and want to share it.  Hopefully it will save someone else some time.

When I first tried pulling out the old seal it basically disintegrated in my hands.
It came out in chunks and left all kinds of gunk in the track.  If there is anything left 
in the track you will not be able to put the new seal in. 

I tried scraping out the track with just about anything I could lay my hands on. 
Screwdrivers, paint can opener, razerblade, you name it, I tried it.  After virtually no success
I hit the internet and decided to see what others had done.  Thank goodness
everyone is so ready to share their renovation stories.  

I came back and decided to use the following tips:
  1. Use a heat gun or blow dryer to heat the old rubber and soften it up. 
  2. be patient
  3. Use a small pick to scrape out the track
  4. be patient
  5. Use soapy water or lubricant on the track to allow new seal to slide into track 
  6. be patient
  7. Use a screwdriver to poke the seal into the teeny tiny track
  8. be VERY patient
  9. make sure you put the fatter side of the seal in first (this is towards the window side)
  10. Be super excited when you are done!!!
They say a picture is worth a 1000 words, so here it is in pictures....


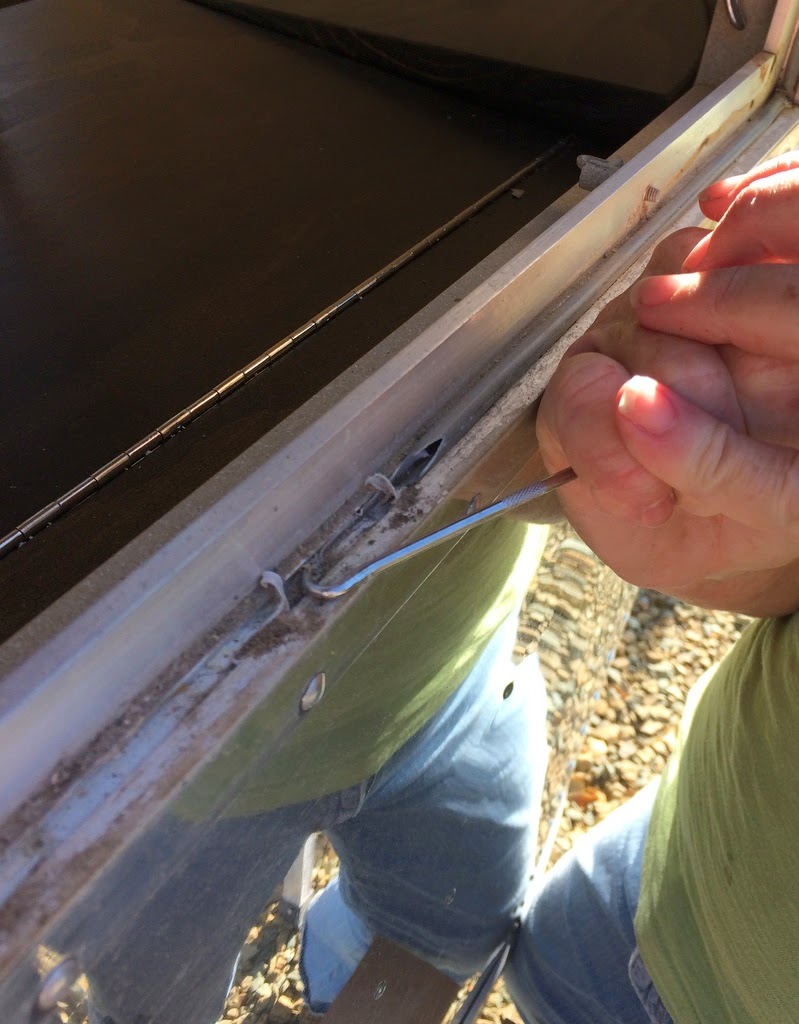
Trying to scrape out the OLD rubber seal with my new pick.
Not quite doing the job.


heating up the old seal piece left in the track to soften it up.


Heating up the track and old seal remnants so it will scrape out.  I used this little
pick we Robert found at Walmart.  Like a dental pick but larger.
  A dental pick might not be a bad option if you have one laying around.

The track is very clean.  I opted to use WD40 as the lubricant for the track. 
Don't use too much or you will have it running down the outside of your trailer.


Measure the new seal and cut with box cutter


Take your time as you push the thin seal flange into the teeny tiny track.  It tears fairly
easily but with the added lubricant and patience it will go right in.
Be careful not to over stretch the seal.  I think this will probably shrink somewhat after
being installed so you don't want to stretch it way out and then have it shrink up
even more than expected.
  

I promise you this will work.  I did all the windows.  There are other window repairs to do,
but I need to work up my enthusiasm for this particular job! 
 
 If you are looking for repair supplies check out vintage trailer supply  
they have just about everything you could want. 

Next on the list: 
  1. finish up the electrical and install the microwave. 
  2. add stainless panel behind range
  3.  Install the new refrigerator
  4. heater
  5. hot water tank. 
  6. replace gasket at entry door
  7. install new fans at ceiling
  8. Install new faucets
  9. Probably about 10 other things I am forgetting
  10.  Add cute stuff! I just want to do this one!  


Wednesday, November 26, 2014

Happy Thanksgiving - I am thankful for progress!


I cannot believe how fast time is going by.   When I first read about the length
of time some Airstream renovations took, I naively thought "that won't be us!" 
Lo and behold the weeks slip by.  Bottom line is it is a drag to have
to work and only be able to devote weekends
to the fun things in life like our Airstream! 

However, a few things are coming together and progress is obvious.
The biggies recently are the installation of our floor.  After reading numerous
blogs by other owners and weighing the pros and cons of various floor options
we chose cork. The reason was durability, flexibility, and how light weight it is.

It actually went in very easily. Thus sayeth the observer!
Due to the way we approached the renovation the floor is not under
any of the cabinets.  There is less flooring going in but also in the event
of a water issue we can pull up the floor without ripping out the
cabinetry/ furniture.  At least this is our theory.  It made the cutting/ install a
little more work, but Robert is an uber talented guy and he sailed through it.

Foam underlayment goes down.  


A little cutting in the bathroom.


I love the contrast with the color of the cabinets and benches!  Just need to add
the rest of the shoe mold and we are done!  Check!


At approximately the same time I decided to take on a little project. With the relocation
of the dinette we needed some lighting over the table.  The obvious solution is
an LED puck light.  Low energy use, they don't get hot and the color in LED
lighting is vastly improving.  We had removed a double head spot light
at the back wall.  So there were wires dangling in the closet that can be rerouted
to the new LED pucks.  I mounted them under the upper cabinets, then
drilled holes for the wires to pull up into the upper storage cabinets.

A nice clean look.


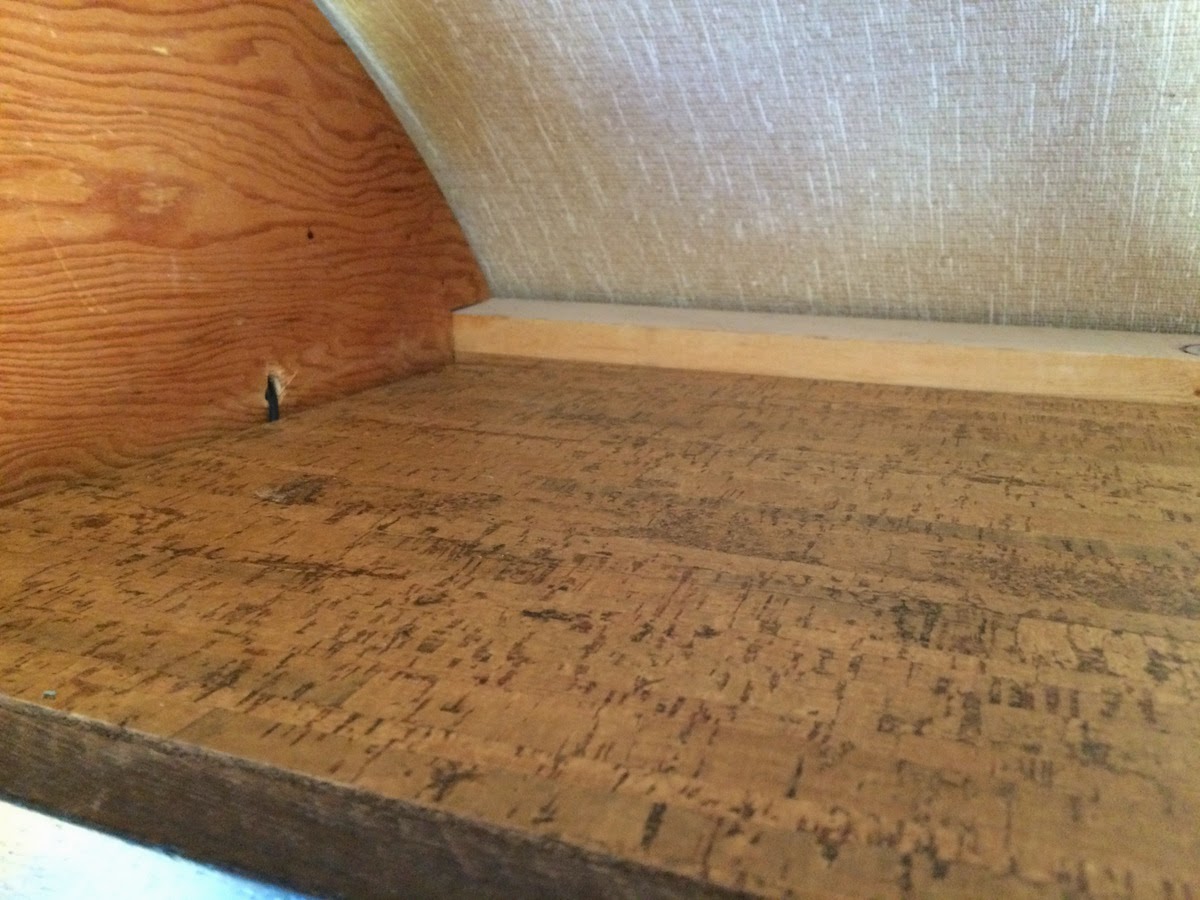
Since the wires don't lay flat this required creating
false floor in the upper cabinet so that things can still
be stored on a level surface. 


Robert was telling me he had a solution but I had to wait.  So I took matters
into my own hands (patience is not my strong point) and used
some of the left over cork flooring.  After cutting it to size, added some
  small pieces underneath to raise the surface and viola!
I have a nice clean stable floor for the cabinets and you can easily get
to the wiring if need be.  Robert still had a bit of a critical eye
(I think it is mostly because he didn't think of it) but he begrudgingly
gave me props for my simple and fast solution. All he has to do is
pull the available wires into the upper cabinet and we have light.


The last little project was the installation of the tile backsplash. As a
designer I can't imagine not having a tile splash but I am realistic enough
to not want to install something that will crack and pop off because
of the movement in our little trailer. After quite a bit of research and
consulting some of my talented tile contractors I have opted to 
use a small stone and metal mosaic and take it only 4" high.
I also opted to use a metal  trim piece in order to avoid having to
find a small decorative trim piece. My theory is the less glued to the wall the better.

Here is the metal being installed


We applied the tile with a silicone latex caulking.  Mold resistant, flexible,
and it should hold up great.


A close up of the tile.  I think it looks super clean.  Now I just need to grout it.


A larger shot of the splash.   The edge detail still needs to go on the countertop.
We are going to add a silver magnetic metal panel over the large space above the cooktop. 
Cuteness factor all the way. 

We also ordered a new furnace a couple of days ago.  We finally got around to turning on
the one in the trailer and the noise was deafening.  One more thing to add to the list
of stuff to do.  Seems like we check off a few things and add a few things every week.
Par for the course  and we will persevere!
Happy Thanksgiving!


Sunday, November 2, 2014

We have a bed (or at least a place for a bed!)


 Our new license plates for the Airstream have arrived! 

  I had extremely good intentions of updating this blog sooner.  While we are making steady progress 
we also seem to be generating quite a mess and the photo ops are few!  When thinking about how 
we wanted to use our Airstream we knew that we would prefer a full time bed versus making a bed
 out of the dinette every evening.  As I mentioned before, we did a big floor plan flip and have
 built a queen size bed platform where the original dinette was. 


We want to try and take advantage of every square inch and have created
some additional storage at the front of the Airstream that sits above the fresh water tank.


There is a fairly deep box right in the center that will be handy for pajamas or
something and then there is a bin at each end that can hold other things.  Maybe a good book!

Speaking of pajamas I am so excited that Target is carrying some fun PJ's by Nick and Nora.
They are Airstream inspired and beyond cute with pink flamingos and little airstreams.
Being a now loyal Airstream groupie I felt obligated to buy myself a pair!
How can you not love these?


                      Back to the new bed.....we wanted to accomplish a couple of things with this bed frame. 
                                  1-Create usable storage  

                                  2- Keep a little bit of the vintage charm by reusing the original Airstream bins
                                         and hardware that were in the Safari when we purchased it. 

                                   I am super happy with Robert's creative skills and the results. 


The bed platform lifts up and you can reach the additional storage space easily.
We used lifts supports and they went in super easy per Robert. 

At the same time the new dinette is just about done.  While the storage looks original from the
exterior we now have some nice deep storage boxes inside!
Pots and pans should be extremely happy in there!


And I love the new cushions.  They are beyond adorable as far as I am concerned.


Pippa likes the cushions too!

Robert has just started working on the new countertops. This is the one that sits above the 
refrigerator. The pop of color is perfect! There is an existing cabinet that will sit back 
on top of it. I love the red laminate and the vintage metal edge trim is so cute.


looking back at the bed platform

Just a couple of more items.  I have been all over the map trying to come up with an overhead
bin storage solution that worked visually and practically.  The doors originally on these cabinets were
in good condition but in a moment of reckless abandon I removed the doors of the cabinets
which were covered in a wall paper type material.  I thought I would take the wallpaper off and
refinish them.  Upon further inspection the doors were actually a low quality plywood.
In the mean time the hardware that held these doors had been removed (oops) and it is just about
impossible to put it back on. So the quest for a new solution began.

If we were going to put on new doors I wanted some that had a opaque panel in them.
I really wanted a cool piece of resin from a company called 3form. Check them out if you
are the arty type.  They even have a remnant section which is perfect for our application.
 However, I could never find a piece that seemed to be the right choice, in the right size,
 at the right price.  So on to plan B.  I found this vinyl stick on stuff at Home Depot.  
I liked the pattern, liked  the price and we decided to give it a go. Robert
built the new doors and I applied the pattern vinyl to a clear plexiglass sheet.  Easy Peasy! 
 If someday 3form has the most amazing piece of resin available I can change it out.  
Win, win I think!


Last but not least, the new little LED lights have been installed by the bed.  The original
spot lights were a mix of broken and almost broken so we opted to change them out
to these.  Energy efficient, fairly vintage looking and affordable.  I like it.


Still on the list to finish:
  •   new counter top at sink side
  • new sink and cooktop,
  •  table at the dinette
  • install new refrigerator
  • install new hot water heater
  • install new microwave
  • new faucet in bathroom
  • install new flooring
  • hang up curtains and shades
  • PUT IN ALL THE CUTE STUFF!
  •