This was a good weekend! We did something that actually created a
sense of the coming completion of our project.
sense of the coming completion of our project.
The Mandarin Red Wilsonart Laminate looks as terrific as I imagined.
Here are a couple of DIY photos. We wanted to use a vintage look metal
band at the edge of the tops. Very appropriate for a 1965 airstream.
We picked this ribbed metal edge.
band at the edge of the tops. Very appropriate for a 1965 airstream.
We picked this ribbed metal edge.
 |
| after gluing the laminate to the wood Robert began to apply the metal edge. note the thin slot on the table edge that the metal slides into. |
 |
| carefully tap the edge into the slot cut into the wood |
 |
| sweet! |
After much discussion and beta testing we decided the
removable leg should go right here!
removable leg should go right here!
I love it! The pop of red is perfect! Not too red, not too orange, just right!
On a totally different subject I did a little window repair recently. I was so
frustrated trying to pull out 50 year old rubber that had basically melted into the
window track. After quite a bit of research on how to solve my repair dilemma
I found my way and want to share it. Hopefully it will save someone else some time.
frustrated trying to pull out 50 year old rubber that had basically melted into the
window track. After quite a bit of research on how to solve my repair dilemma
I found my way and want to share it. Hopefully it will save someone else some time.
When I first tried pulling out the old seal it basically disintegrated in my hands.
It came out in chunks and left all kinds of gunk in the track. If there is anything left
in the track you will not be able to put the new seal in.
I tried scraping out the track with just about anything I could lay my hands on.
Screwdrivers, paint can opener, razerblade, you name it, I tried it. After virtually no success
I hit the internet and decided to see what others had done. Thank goodness
everyone is so ready to share their renovation stories.
I hit the internet and decided to see what others had done. Thank goodness
everyone is so ready to share their renovation stories.
I came back and decided to use the following tips:
- Use a heat gun or blow dryer to heat the old rubber and soften it up.
- be patient
- Use a small pick to scrape out the track
- be patient
- Use soapy water or lubricant on the track to allow new seal to slide into track
- be patient
- Use a screwdriver to poke the seal into the teeny tiny track
- be VERY patient
- make sure you put the fatter side of the seal in first (this is towards the window side)
- Be super excited when you are done!!!
They say a picture is worth a 1000 words, so here it is in pictures....
 | |
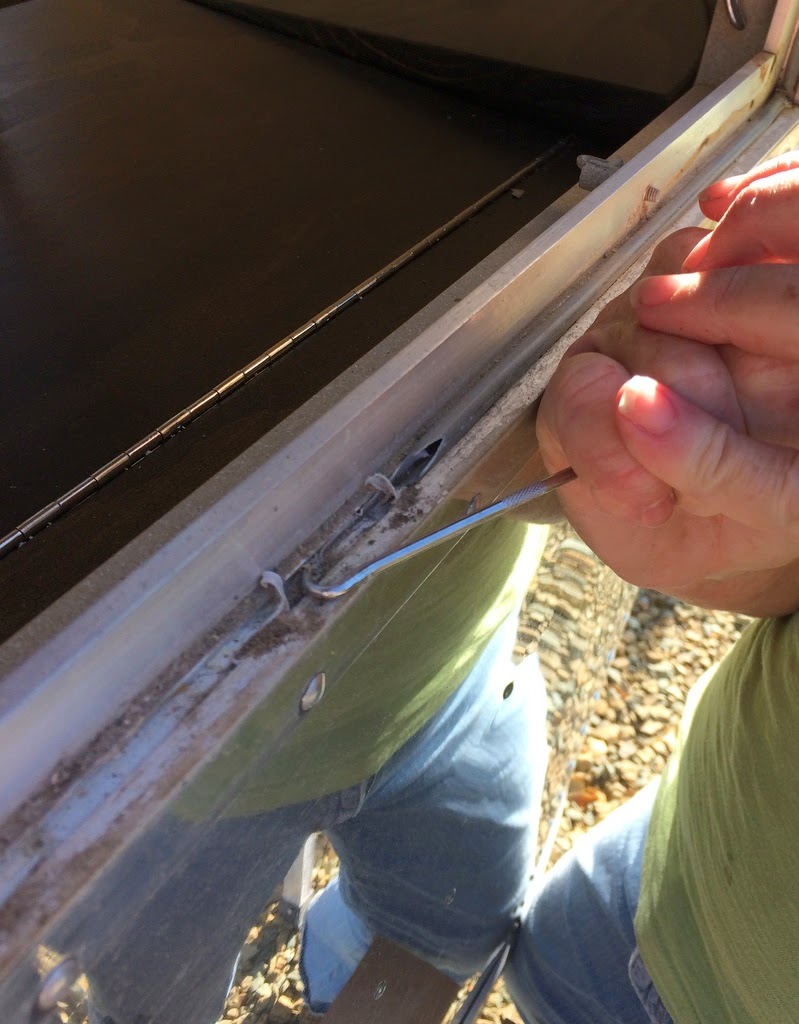
| Trying to scrape out the OLD rubber seal with my new pick. Not quite doing the job. |
 |
| heating up the old seal piece left in the track to soften it up. |
 |
| The track is very clean. I opted to use WD40 as the lubricant for the track. Don't use too much or you will have it running down the outside of your trailer. |
 |
| Measure the new seal and cut with box cutter |
I promise you this will work. I did all the windows. There are other window repairs to do,
but I need to work up my enthusiasm for this particular job!
If you are looking for repair supplies check out vintage trailer supply
they have just about everything you could want.
they have just about everything you could want.
- finish up the electrical and install the microwave.
- add stainless panel behind range
- Install the new refrigerator
- heater
- hot water tank.
- replace gasket at entry door
- install new fans at ceiling
- Install new faucets
- Probably about 10 other things I am forgetting
- Add cute stuff! I just want to do this one!


No comments:
Post a Comment